MR. PIG TUTORIAL
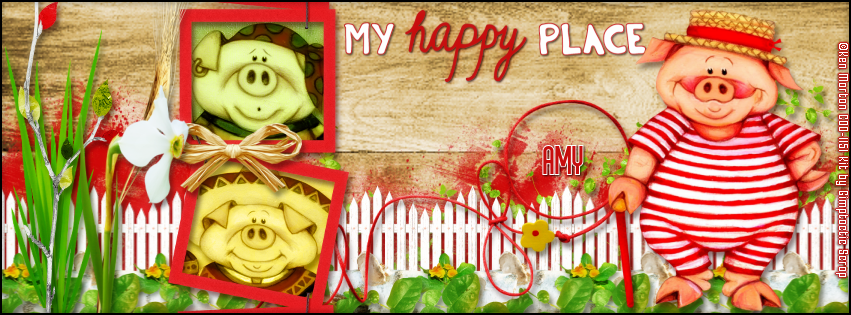
**Click to see original size**
Tutorial written by Marcia Salgado on April 29th, 2016
for those who have a working knowledge of PSP.
I'm using PSP9 to create my tuts.
Any resemblance to any other tutorial is coincidental.
Do not copy and paste this tutorial anywhere on the net.
If you want to translate please ask first.
****************************************
Material:
Tubes: "Package 54" by Ken Morton, you can purchase them here,
do not use without the proper #license.
PTU Kit "My Happy Place" by Gimptastic Scraps,
you can purchase it here
Plugin: MuRa's Meister.
Font: Bronco Regular
****************************************
--> Remember to save often and use my tag as reference if necessary. Use a drop shadow of your preference on layers. I used here 3 tubes from a Package but you can use only one.
1. Create a new image 851x315.
2. Open GS-My_Happy_Place_paper4. Copy and paste as new layer. Move it a little until you like it.
3. Open GS-My_Happy_Place_ele39. Resize 65%. Copy and paste as new layer. Move it down and duplicate it moving it a little up or a little down until you cover the back.
4. Open GS-My_Happy_Place_ele53. Resize 35%. Copy and paste as new layer. Move it down and duplicate it, move it up, use mirror, rotate it a little and cover the red element a little.
5. Open GS-My_Happy_Place_ele41. Resize 50%. Copy and paste as new layer. Use MuRa's Meister > Copies > Line with settings below and move it down. Now you may want to re-arrange the previous elements to look better behind the fence.

6. Open GS-My_Happy_Place_ele37. Resize 45%. Copy and paste as new layer. Use MuRa's Meister > Copies > Line with settings below and move it down.

7. Open GS-My_Happy_Place_ele34. Resize 45%. Copy and paste as new layer. Use MuRa's Meister > Copies > Line with settings below and move it down.

8. Open GS-My_Happy_Place_ele50. Resize 65%. Copy and paste as new layer. Move it down and a little to right.
9. Open GS-My_Happy_Place_ele28. Resize 70%. Copy and paste as new layer. Move it way to left. Duplicate and move it a little bit to right. Merge down.
10. Open GS-My_Happy_Place_ele7. Copy and paste as new layer. Move it way left. Place it in front of the grass.
11. Open GS-My_Happy_Place_wordart1. Resize 50%. Copy and paste as new layer. Move it up and a little to right.
12. Open GS-My_Happy_Place_frame2. Copy and paste as new layer. Adjust it to show only 2 frames.
13. Select inside the upper frame. Expand > 5. Add a new layer and move it below the frame layer. Open GS-My_Happy_Place_paper10. Copy and paste into selection. Invert selection. Open one of your selected tubes. Resize it. Copy and paste as new layer. Place it inside the frame. Delete. Deselect. Select all. Clip to canvas. Crop to selection. Apply a Blend Mode of your preference.
14. Select inside the lower frame. Expand > 5. Add a new layer and move it below the frame layer. Open GS-My_Happy_Place_paper6. Copy and paste into selection. Invert selection. Open one of your selected tubes. Resize it. Copy and paste as new layer. Place it inside the frame. Delete. Deselect. Select all. Clip to canvas. Crop to selection. Apply a Blend Mode of your preference.
15. Open GS-My_Happy_Place_ele43. Resize 55%. Copy and paste as new layer. Place it over the frame at middle.
16. Open GS-My_Happy_Place_ele60. Copy and paste as new layer. Move it to left. Place it on left side of the frame.
17. Open GS-My_Happy_Place_ele54. Resize 70%. Copy and paste as new layer. Move it to left. Place it over the previous element.
18. Open your tube and resize it. Copy and paste as new layer. Move it to right.
19. Add a new layer. Select all. Fill it with Black. Contract > 2. Delete.
--> Add your copyright info and license#. Add your name or initials. Save as PNG.
--> Sometimes I had to change my Timeline size to 846x313 because when I add it to Facebook the image has extra pixels and do not fit perfectly. So try this size if the same is happening to you.
---------------------------------------
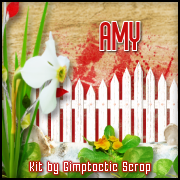
Idea for the Profile Picture