January 31, 2016

Purple Christina ~ by Joanne Salgado


Tutorial written by Joanne Salgado on January 31th, 2016
for those who have a working knowledge of PSP.
Any resemblance to any other tutorial is coincidental.
Do not copy and paste this tutorial anywhere on the net.
If you want to translate please ask first. 

Tube: Christina by Toriya - you can purchase here
Kit Christina by Design by Joan - you can purchase here
Font: Throw My Hands Up in the Air

Don't forget to save often.
At any point if you have doubts check my tag.

1. Open a new image 650x550

2. Open element 'CHRISTINA_DBJ-ELEM (69)' copy and paste as new layer. Resize 70%.

3. Open element 'CHRISTINA_DBJ-ELEM (12)' copy and paste as new layer. Resize 70%. Move this layer below the frame layer. Arrange it to the left. Duplicate. Mirror/Flip.

4. Open element 'CHRISTINA_DBJ-ELEM (29)' copy and paste as new layer. Resize 40%. Arrange it to the top left. Duplicate. Arrange it to the bottom right. Duplicate. Arrange it to a little up the one we just added. Duplicate. Mirror. Arrange it a little to the bottom of the one in the right.

5. Open element 'CHRISTINA_DBJ-ELEM (54)' copy and paste as new layer. Resize 40%. Arrange it to the bottom left. Duplicate. Arrange it to the top right.

6. Open element 'CHRISTINA_DBJ-ELEM (9)' copy and paste as new layer. Resize 70%. Arrange it to the top left. Duplicate. Flip. Arrange it to the bottom right. Clean the parts we wont need, the ones that appears at the top right and bottom left.

7. Open element 'CHRISTINA_DBJ-ELEM (22)' copy and paste as new layer. Resize 40%. Arrange it to the top left. Clean all the parts that we wont need (we just need the little from the front). Duplicate. Mirror/Flip.

8. Open element 'CHRISTINA_DBJ-ELEM (10)' copy and paste as new layer. Resize 70%. Rotate 15 left. Arrange it to the top left. Duplicate. Arrange it to bottom right.

9. Open element 'CHRISTINA_DBJ-PP (7)' copy and paste as new layer. Resize 50%. Arrange it inside the frame. Clean the outside parts.

10. Open your tube. Copy and paste as new layer. Resize as needed. Move this layer above the frame layer and clean the parts you need to show as mine - a part inside the frame and a part outside.

11. Open element 'CHRISTINA_DBJ-ELEM (103)' copy and paste as new layer. Resize 70%. Arrange it to the right. Duplicate. Mirror/Flip. Clean the parts that stays above your tube's face.

12. Open element 'CHRISTINA_DBJ-ELEM (35)' copy and paste as new layer. Arrange it to the bottom right.

13. Add shadow as you prefer.

14. Add copyright. Add name. Save as PNG.

SHOW OFF - Fairy Cove


== NEW CT CREATIVE SCRAPS BY CRYS PTU TAG ==

Featuring "Fairy Cove" Kit by Creative Scraps by Crys.


Come frolic with the Fairies, jump from lilly pad to lilly pad with the frogs. Sit and swing on the flowers, or grab a cup of tea on a toad stool down in Fairy Cove.  Tagger size kit has 72 Elements and 14 Papers.

Kit can be found at:

-> Mystical Scraps here

Don't forget to visit her blog:


Orange Millena ~ by Joanne Salgado


Tutorial written by Joanne Salgado on January 31th, 2016
for those who have a working knowledge of PSP.
Any resemblance to any other tutorial is coincidental.
Do not copy and paste this tutorial anywhere on the net.
If you want to translate please ask first. 

Tube: Millena by Toriya - you can purchase here
Kit Millena by Kizzed by Kelz - you can purchase here
Font: Dawning of a New Day

Don't forget to save often.
At any point if you have doubts check my tag. 

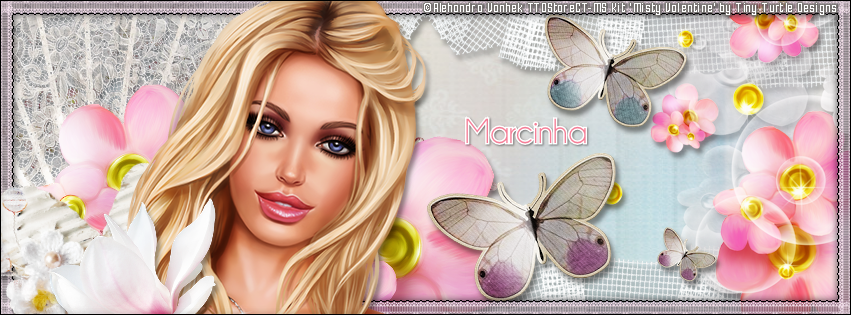
1. Open a new image 851x315

2. Open paper 'KBK_Millena (25)' copy and paste as new layer. Use Raster Deform Tool to stretch the paper so it fills the canvas. Arrange it a little to the top so the flowers appears only at the bottom.

3. Open element 'KBK_Millena (37)' copy and paste as new layer. Arrange it to the bottom right.

4. Open your close up tube. Copy and paste as new layer. Resize if needed. Arrange it to the middle left. Change blend mode to soft light.

5. Open element 'KBK_Millena (9)' copy and paste as new layer. Arrange it to the left.

6. Open element 'KBK_Millena (56)' copy and paste as new layer. Arrange it to the bottom left. Change blend mode to soft light.

7. Open element 'KBK_Millena (73)' copy and paste as new layer. Arrange at the middle. Change blend mode to soft light.

8. Open element 'KBK_Millena (77)' copy and paste as new layer. Arrange it to the bottom left. Duplicate. Arrange it to the bottom right.

9. Open element 'KBK_Millena (79)' copy and paste as new layer. Arrange it to the left. Duplicate. Mirror/Flip. Arrange it to the top right.

10. Open element 'KBK_Millena (130)' copy and paste as new layer. Arrange it to the left. Change blend mode to overlay and change opacity to 50. Duplicate. Mirror. Arrange it to the right.

11. Open element 'KBK_Millena (141)' copy and paste as new layer. Arrange it to the top left. Duplicate. Arrange it to the right.

12. Open your tube. Copy and paste as new layer. Resize if needed and arrange it to the middle right.

13. Add a new layer. Select all, fill with #da9435 contract 1. Hit delete on your keybord. Keep Selected.

14. Add a new layer. Fill with white, add noise uniform/monochrome checked/50. Contract 5. Hit delete on your keybord. Select none. Change blend mode to soft light.

15. Add shadow as you prefer.

16. Add copyright. Add name. Save as PNG.

Blue Millena ~ by Joanne Salgado


Tutorial written by Joanne Salgado on January 31th, 2016
for those who have a working knowledge of PSP.
Any resemblance to any other tutorial is coincidental.
Do not copy and paste this tutorial anywhere on the net.
If you want to translate please ask first. 

Tube: Millena by Toriya - you can purchase here
Kit Millena by Design by Joan - you can purchase here
Font: Teaters

Don't forget to save often.
At any point if you have doubts check my tag. 

1. Open a new image 650x550

2. Open element 'MLLENA_DBJ-ELEM (25)' copy and paste as new layer. Resize 60%. Rotate right 10. Arrange it to the left.

3. Open element 'MLLENA_DBJ-ELEM (22)' copy and paste as new layer. Resize 70%. Mirror. Move this layer below the frame layer and arrange it to the right of the frame.

4. Open element 'MLLENA_DBJ-ELEM (13)' copy and paste as new layer. Resize 70%. Arrange it to the bottom right of the frame.

5. Open element 'MLLENA_DBJ-ELEM (40)' copy and paste as new layer. Resize 70%. Arrange it to the right of the frame above the flower we just added.

6. Open element 'MLLENA_DBJ-ELEM (24)' copy and paste as new layer. Resize 70%. Arrange it to the top right of the frame.

7. Open paper 'MLLENA_DBJ-PP (2)' copy and paste as new layer. Resize 40%. Arrange it inside the frame and clean the parts that appears outside it.

8. Open element 'MLLENA_DBJ-ELEM (31)' copy and paste as new layer. Resize 50%. Move this layer above the frame layer. Arrange it to the bottom right of the canvas.

9. Open element 'MLLENA_DBJ-ELEM (78)' copy and paste as new layer. Resize 60%. Mirror/Flip. Arrange it to the top.

10. Open your tube. Copy and paste as new layer. Resize as you prefer and arrange it inside the frame. Clean the parts that need to look like your tube is part inside the part outside the frame (like mine).

11. Open element 'MLLENA_DBJ-ELEM (54)' copy and paste as new layer.Resize 35%. Arrange it to the left.

12. Open element 'MLLENA_DBJ-ELEM (29)' copy and paste as new layer. Resize 40%. Arrange it to the bottom left.

13. Open element 'MLLENA_DBJ-ELEM (2)' copy and paste as new layer. Resize 50%. Arrange it to the right of the frame.

14. Open element 'MLLENA_DBJ-ELEM (77)' copy and paste as new layer. Resize 70%. Arrange it to the left. Duplicate. Flip. If needed clean the sparkles from your tube's face.

15. Open element 'MLLENA_DBJ-ELEM (78)' again, copy and paste as new layer. Resize 60%. Arrange it to the bottom.

16. Add shadow as you prefer.

17. Add copyright. Add name. Save as PNG.

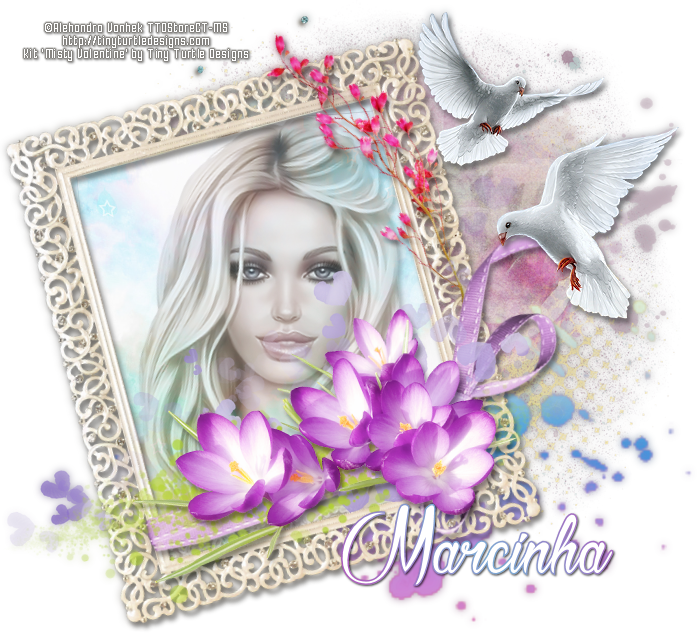
Misty Valentine with Angelica with Doves


== NEW PTU TAG TINY TURTLE DESIGNS CT ==
AND THE ART OF ALEHANDRA VANHEK

Featuring "Angelica with Doves", a Alehandra Vanhek tube 
and "Misty Valentine", Tiny Turtle Design kit at TinyTurtleDesign Store.


Tiny Turtle Design kit has 54 papers and 194 elements so you can play with it. 

Alehanfra Vanhek's tube can be found  at:
-> TinyTurtleDesign Store, here 

Tiny Turtle Design kit can be found  at:
-> TinyTurtleDesign Store, here 


January 30, 2016

SHOW OFF - I love you


== NEW PTU TAG TINY TURTLE DESIGNS CT ==
AND THE ART OF ALEHANDRA VANHEK

Featuring "Miranda", tube by Alehandra Vanhek and "I love you", Tiny Turtle Design kit at TinyTurtleDesign Store.

Alehandra Vanhek's tube can be found  at:
-> TinyTurtleDesign Store, here

Tiny Turtle Design kit can be found  at:
-> TinyTurtleDesign Store, here


Snow Hat ~ by Joanne Salgado


Tutorial written by Joanne Salgado on January 30th, 2016
for those who have a working knowledge of PSP.
Any resemblance to any other tutorial is coincidental.
Do not copy and paste this tutorial anywhere on the net.
If you want to translate please ask first. 

Tube: Snow Hat by Danny Lee - you can purchase here
Kit Snow Hat Match by Cherry Blossom Designs - you can purchase here
Font: Nothing You Could Do

Don't forget to save often.
At any point if you have doubts check my tag.

1. Open a new image 650x550

2. Open element 'Frame 3'copy and paste as new layer. Resize 90%. Arrange it to the left.

3. Open paper 'Paper 2' copy and paste as new layer. Resize 50%. Move this layer below the frame layer. Arrange it inside the frame to the top. Don't worry about the bottom, we will cover it soon.

4. Open element 'Element 3' copy and paste as new layer. Resize 60%. Arrange it to the bottom of the frame.

5. Open element 'Element 17' copy and paste as new layer. Resize 40%. Arrange it to the right of the frame.

6. Open element 'Element 4' copy and paste as new layer. Resize 20%. Arrange it to the bottom right of the frame.

7. Open element 'Element 9' copy and paste as new layer. Resize 20%. Arrange it to the left side of the bench we just added.

8. Open element 'Element 8' copy and paste as new layer. Resize 40%. Mirror. Arrange it to the left of the frame.

9. Add a new layer. Select inside the frame, expand 2. Fill with white. Change opacity to 30. Keep selected. Go to every layer we added and hit delete on your keyboard to clean all the outside parts of the elements. Selection None.

10. Go again and select every element (not the frame) and Adjust/Hue and Saturation/Colorize - both 0. We need the elements to be black and white.

11. Open element 'Element 66' copy and paste as new layer. Resize 85%. Go to Adjust/Color Balance/Manual Color Correction and source=#94c8e2 and target=#ffffff. Move this layer above the frame layer. Arrange it to the left of the canvas.

12. Open element 'Element 46' copy and paste as new layer. Resize 50%. Arrange it to the bottom left of the frame.

13. Open element 'Element 45' copy and paste as new layer. Resize 70%. Arrange it to the bottom left of the frame.

14. Open element 'Element 52' copy and paste as new layer. Resize 50%. Arrange it to the top right of the frame.

15. Open your tube. Copy and paste as new layer. Resize as you prefer and arrange it to the right.

16. Add shadow as prefer.

17. Add copyright. Add name. Save as PNG.

Katherina

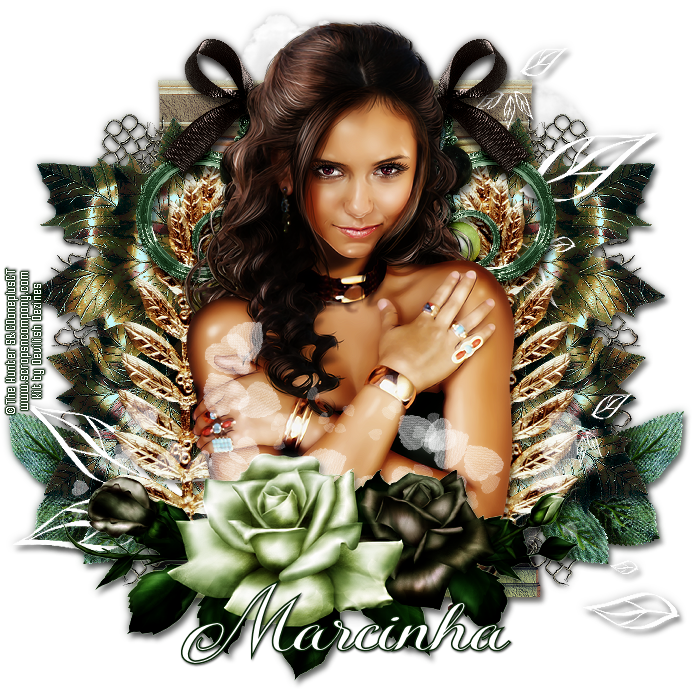
MISTERIOSA TUTORIAL


Tutorial written by Marcia Salgado on January 30th, 2016
for those who have a working knowledge of PSP.
I'm using PSP9 to create my tuts.
Any resemblance to any other tutorial is coincidental.
Do not copy and paste this tutorial anywhere on the net.
If you want to translate please ask first. 

****************************************
Material:

Tube: "Katherina" by The Hunter, you can purchase it here
do not use without the proper #license.
PTU Kit "Katherina" by Devilish Dezines, you can purchase it here
Font: Kazincbarcika Script

****************************************

--> Remember to save often and use my tag as reference if necessary. Use a Drop Shadow of your preference on layers. 

1. Create a new image 700x700. 

2. Open element19. Resize 65%. Copy and paste as new layer. Move it up.

3. Open element7. Resize 65%. Copy and paste as new layer. 

4. Open element35. Resize 60%. Copy and paste as new layer. Move it to right and place it over the column. Duplicate. Mirror. Merge down.

5. Open element17. Resize 30%. Copy and paste as new layer. Move it down and to left. Duplicate. Mirror. Merge down.

6. Open element6. Resize 60%. Copy and paste as new layer. Move it to right. Duplicate, Mirror, Merge down.

7. Open element39. Resize 85%. Copy and paste as new layer.

8. Open element15, Resize 65%. Copy and paste as new layer. Move it to left. Duplicate. Mirror. Merge down.

9. Open element23. Resize 50%. Copy and paste as new layer. Move it up and to left. Duplicate. Mirror. Merge down.

10. Open your tube closeup. Resize if needed. Copy and paste as new layer. 

11. Open element9. Resize 65%. Copy and paste as a new layer. Move it down.

12. Open element2. Resize 65%. Copy and paste as new layer. Move it down. Erase the parts showing below tis elements in other layers: tube and white hearts, for example.


--> Add your copyright info and license#. Add your name and save as PNG.


Olivia

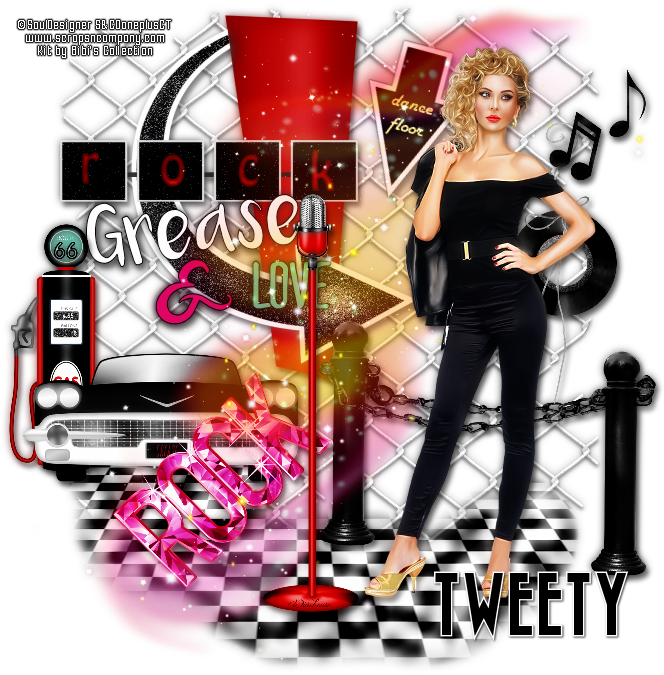
GREASE TUTORIAL


Tutorial written by Marcia Salgado on January 30th, 2016
for those who have a working knowledge of PSP.
I'm using PSP9 to create my tuts.
Any resemblance to any other tutorial is coincidental.
Do not copy and paste this tutorial anywhere on the net.
If you want to translate please ask first. 

****************************************
Material:

Tube: "Olivia" by SoulDesigner, you can purchase it here
do not use without the proper #license.
PTU Kit "Olivia" by Bibi's Collection, you can purchase it here
Font: Bazar

****************************************

--> Remember to save often and use my tag as reference if necessary. Use a Drop Shadow of your preference on layers.

1. Create a new image 700x700.

2. Open BIBI-OLIVIAS ELEMS (66). Resize 50%. Copy and paste as new layer. Move it up.

3. Open BIBI-OLIVIAS ELEMS (15). Resize 35%. Copy and paste as new layer. Move it down.

4. Open BIBI-OLIVIAS ELEMS (40). Copy and paste as new layer. Move it up and to left. 

5. Open BIBI-OLIVIAS ELEMS (37). Resize 65%. Free Rotate: Right-15. Copy and paste as new layer. Move it up and a little to right.

6. Open. BIBI-OLIVIAS ELEMS (39). Resize 35%. Copy and paste as new layer. Move it down and way to left.

7. Open BIBI-OLIVIAS ELEMS (38). Resize 40%. Copy and paste as new layer. Move it down and to left.

8. Open BIBI-OLIVIAS ELEMS (82). Resize 45%. Copy and paste as new layer. Move it down and to right.

9. Open BIBI-OLIVIAS ELEMS (76). Resize 50%. Copy and paste as new layer. Move it down and a little to left.

10. Open BIBI-OLIVIAS ELEMS (34). Resize 40%. Copy and paste as new layer. Move it up and to right.

11. Open BIBI-OLIVIAS ELEMS (12). Resize 60%. Copy and paste as new layer.

12. Open BIBI-OLIVIAS ELEMS (29). Resize 45%. Copy and paste as new layer. Move it down.

13. Open BIBI-OLIVIAS ELEMS (72). Resize 45%. Copy and paste as new layer. Move it up and to right.

14. Open your tube. Resize if needed. Copy and paste as new layer. Move it to right. You may want to rearrange the elements to better fit your tube.


--> Add your copyright info and license#. Add your name and save as PNG.


January 29, 2016

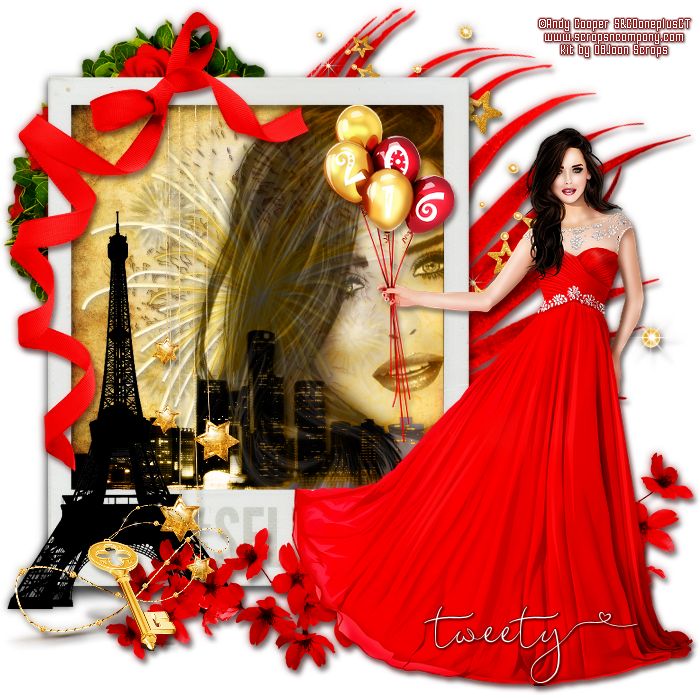
Balloons 2016

SELFIE TUTORIAL


Tutorial written by Marcia Salgado on January 30th, 2016
for those who have a working knowledge of PSP.
I'm using PSP9 to create my tuts.
Any resemblance to any other tutorial is coincidental.
Do not copy and paste this tutorial anywhere on the net.
If you want to translate please ask first. 

****************************************
Material:

Tube: "Balloons 2016" by Andy Cooper, you can purchase it here
do not use without the proper #license.
PTU Kit "Balloons 2016" by DBJoan Scraps, you can purchase it here
Font: featherly

****************************************

--> Remember to save often and use my tag as reference if necessary. Use a Drop Shadow of your preference on layers. 

1. Create a new image 700x700.

2. Open BALLOONS 2016_DBJ- (53). Resize 80%. Flip. Copy and paste as new layer. Move it up and left. Place it on top left corner.

3. Open BALLOONS 2016_DBJ- (103). Free Rotate: Right-15. Copy and paste as new layer. Move it a little up and a little to right. 

4. Open BALLOONS 2016_DBJ- (4). Resize 65%. Copy and paste as new layer. Move it up and to right.

5. Open BALLOONS 2016_DBJ- (2). Copy and paste as new layer. Move it up and to left.

6. Select inside the frame. Expand > 5. Add a new layer and move it below frame layer. Open BALLOONS 2016_DBJ-PP (5). Copy and paste into selection. Deselect.

7. Open BALLOONS 2016_DBJ- (26). Resize 50%. Copy and paste as new layer. Move it inside the frame on top. Blend Mode: Luminance (Legacy).

8. Open BALLOONS 2016_DBJ- (1). Copy and paste as new layer. Move it inside the frame on top.

9. Open BALLOONS 2016_DBJ- (54). Resize 50%. Copy and paste as new layer. Move it inside the frame on bottom. Blend Mode: Luminance (Legacy).

10. Select inside the frame again. Expand > 5. Open your tube close up. Resize if needed. Free Rotate: Left-8. Copy and paste as new layer. Place only half of the face inside the frame. Invert selection. Delete. Select all. Clip to Canvas. Crop to selection. Blend Mode: Luminance (Legacy). Low the layer opacity to 64. Duplicate. Gaussian Blur: 4. Blend Mode: Soft Light.

11. Open BALLOONS 2016_DBJ- (49). Resize 75%. Copy and paste as new layer, Move it down and to left.

12. Open BALLOONS 2016_DBJ- (71). Resize 65%. Copy and paste as new layer. Move it down and to right.

13. Open BALLOONS 2016_DBJ- (101). Resize 65%. Copy and paste as new layer. Move it up and to left and place it hanging from the top of the frame.

14. Open BALLOONS 2016_DBJ- (3). Resize 75%. Mirror. Copy and paste as new layer. Move it up and way to left. Place it over the left side of the frame a little over the hanging stars strings.

15. Open your tube. Resize if needed. Copy and paste as new layer. Move it down and to right.

16. Open BALLOONS 2016_DBJ- (32). Resize 45%. Copy and paste as new layer. Move it down and to left. Place it over the Eiffel Tower at bottom. 


--> Add your copyright info and license #. Add your name and save as PNG.


When Derika Dreams

DREAMLAND TUTORIAL


Tutorial written by Marcia Salgado on January 27th, 2016
for those who have a working knowledge of PSP.
I'm using PSP9 to create my tuts.
Any resemblance to any other tutorial is coincidental.
Do not copy and paste this tutorial anywhere on the net.
If you want to translate please ask first. 

****************************************
Material:

Tube: "Monarch" by Rachel Anderson, you can purchase it here,
do not use without the proper #license.
PTU Kit "When Derika Dreams" by Hungry Hill,
you can purchase it here 
Material: Made by me, ms2016_ground, just click and save.:


Font: Pretty Girls Script Demo

****************************************

--> Remember to save often and use my tag as reference if necessary. Use a Drop Shadow of your choice. 

1. Create a new image 700x500.

2. Open sparkles. Resize 50%. Copy and paste as new layer. Move it up and way to left. Duplicate. Mirror. Merge down.

3. Open windows. Resize 65%. Copy and paste as new layer. Move it up and to right. Rename it WINDOW.

4. Now the paper aplication needs to be done window by window. Select the first window frame. Expand > 10. Add a new layerand move it below the window layer. Rename it OUTSIDE. Open paper-2. Copy and paste into selection. Keep selected. Add a new layer. Open paper-1.  Copy and paste into selection. Blend Mode: Soft Light. Deselect. Rename this layer to LIGHT. Click on WINDOW layer ad select the second window and expand by 10. Click on OUTSIDE layer. Open paper-2 and copy into selection. Click on LIGHT layer. Open paper-1. and copy into selection, change blend mode to soft light and deselect. Repeat the same with third window.

5. Click on WINDOW layer. Open grass-mound. Resize 40%. Copy and paste as new layer. Move it below WINDOW layer. Move the element down and place it between second and third windows at the bottom.

6. Click on WINDOW layer. Open copse. Resize 50%. Copy and paste as new layer. Move this layer below WINDOW layer. Move the element way to right. Leave it as it is by now. Later we will clean it.

7. Click on WINDOW layer, Open tendril. Resize 30%. Copy and paste as new layer. Place it inside the first window frame. Duplicate and move it a little to right. Leave it as it is by now. Later we will clean it.

8. Click on WINDOW layer, Open light-effect-2. Resize 60%. Copy and paste as new layer. Move it up and a very little to right. Move it below WINDOW layer. 

9. Click on WINDOW layer again and select the area outside the element. Expand > 3. Click on layer below, with the light, and delete and do the same on tree and on tendril elements layers. Select all. Clip to canvas. Crop to selection. Do not forget to clean with the eraser betwwen the window frames on each element layer too.

10. Click on WINDOW layer. Open hummingbird-2. Resize 20%. Copy and psate as new layer. Move it up and to right.

11. Open mar2016_ground. Copy and paste as new layer. Move it down.

12. Open lamps. Resize 55%. Copy and paste as new layer. Place it between the first and second window frames.

13. Open grasses. Resize 40%. Copy and paste as new layer. Move it down and place it before the window element.

14. Open flutterby. Resize 10%. Copy and paste as new layer. Place inside the second window frame. Duplicate. Resize 75%. Free Rotate: Right-35. Place it over the trees.

15. Open your tube. Resize if needed. Copy and place as new layer. Move it to left in front of first window frame.

16. Open froggie. Resize 10%. Mirror. Copy and paste as new layer. Move it down. Place it facing the main tube.

17. OPTIONAL - I used the WordArt-1. Resize 35% and placed it on right side at bottom.

--> Add your copyright info and license#. Add your name and save as PNG.


January 28, 2016

Winters End

SNOWING TUTORIAL


Tutorial written by Marcia Salgado on January 27th, 2016
for those who have a working knowledge of PSP.
Any resemblance to any other tutorial is coincidental.
Do not copy and paste this tutorial anywhere on the net.
If you want to translate please ask first. 

****************************************
Material:

PTU Kit "Winters End" TS by Creative Scraps by Crys, you can purchase it here 
Material: Neve 600x300, here
Font: Saldina

****************************************

--> Remember to save often and use my tag as reference if necessary. Use a Drop Shadow of your choice on layers. 

1. Create a new image 600x300. Add a new layer. Select all.

2. Open WE_Paper_12. Use custom selections as shown below:


3. Copy and paste into selection. Keep selected. Rename this layer BACK. Add a new layer. Open WE_Paper_6 and repeat the same before. Deselect.

4.Open WE_Frame_2. Resize 80%. Copy and paste as new layer. Using Free Hand Selection Tool > Point to Point select the frame border as shown below:


5. Click on the layer below the frame, should be the grey paper, and hit delete. Rename this layer COVER.

6. Click on frame layer. Open WE_Element_16. Resize 45%. Copy and paste as new alyer. Move it way to right. Open WE_Element_14. Resize 15%. Copy and paste as new layer. Move this layer below girl layer and place the lantern below her right hand. Click on first layer to continue. 

7. Open WE_Element_37. Resize 25%. Free Rotate: Left-130, Copy and paste as new layer. Move it way to left. Place it over the border braches. 

8. Open WE_Element_21. Resize 25%. Copy and paste as new layer. Move it to left and place it on bottom left corner a little over the previous leaf. Duplicate. Move it a little up and a little to right. Merge down.

9. Open WE_Element_39. Resize 25%. Copy and paste as new layer. Place it over the middle of the previous flowers

10. Add a new layer. Select all. Fill it with black. Contract 1. Delete. Deselect.

11. Click on BACK layer. Open WE_Element_26. Resize 45%. Copy and paste as new layer. Move it down and to left. Place it on left side of the landscape inside the frame. Duplicate and move it to right to make a complete fence. Merge down.

12. Open WE_Element_49. Resize 45%. Mirror. Copy and paste as new layer. Move it down and to right.

13. Open WE_Element_8. Resize 45%. Copy and paste as new layer. Move it up and to left.

14. Open WE_Element_52. Resize 30%. Copy and paste as new layer. Move it down and to left.

15. Open WE_Element_53. Resize 15%. Copy and paste as new layer. Move it down and to left an place it on the fence. Click on first layer. Add your copyright info and license#. Add your name. You can save it as PNG now or continue to add snow to your tag.

16. Turn all layer from COVER layer to up invisible, COVER layer included. Copy merged. In AS -> Paste as new animation the image you copied from PSP. Duplicate it until it has 10 frames. Select all. Activate propagate paste. Open neve 600x300 and select all layer. Copy. Activate your tag back and paste into selected frames.

17. Back to PSP -> Now turn all layer visible again and close the visibility of layers below COVER but this time let COVER layer visible. Copy merged. In AS -> Paste as new animation. Copy. Activate the tag and paste into selected frames. Click to fix it over the back. Change the Frame Properties to 18. Save as GIF.


January 26, 2016

Bad Girls ~ by Joanne Salgado


Tutorial written by Joanne Salgado on January 26th, 2016
for those who have a working knowledge of PSP.
Any resemblance to any other tutorial is coincidental.
Do not copy and paste this tutorial anywhere on the net.
If you want to translate please ask first. 

Tube: Bad Girls by The Hunter - you can purchase here
Kit Bad Girls by Design by Joan - you can purchase here
Font: Andover

Don't forget to save often.
At any point if you have doubts check my tag.

1. open a new image 851x315

2. Open element 'BAD GIRL_DBJ-PP (5)' copy and paste as new layer. Use raster deform tool to stretch the background.

3. Open element 'BAD GIRL_DBJ-ELEM (31)' copy and paste as new layer. Arrange it to the left.

4. Open element 'BAD GIRL_DBJ-ELEM (19)' copy and paste as new layer. Arrange it to the left. Duplicate. Mirror.

5. Open element 'BAD GIRL_DBJ-ELEM (20)' copy and paste as new layer. Arrange it to the left. Duplicate. Mirror.

6. Open element 'BAD GIRL_DBJ-ELEM (73)' copy and paste as new layer. Arrange it to the bottom right.

7. Open element 'BAD GIRL_DBJ-ELEM (30)' copy and paste as new layer. Arrange it to the left.

8. Open element 'BAD GIRL_DBJ-ELEM (73)' again, copy and paste as new layer. Mirror. Arrange it to the bottom left.

9. Open element 'BAD GIRL_DBJ-ELEM (56)' copy and paste as new layer. Arrange it to the bottom left.

10. Open element 'BAD GIRL_DBJ-ELEM (71)' copy and paste as new layer. Rotate right 15. Arrange it to the bottom right.

11. Open element 'BAD GIRL_DBJ-ELEM (56)' again, copy and paste as new layer. Arrange it to the bottom right.

12. Open element 'BAD GIRL_DBJ-ELEM (69)' copy and paste as new layer. Arrange it to the bottom.

13. Open your tube. Copy and paste as new layer. Arrange it to the left.

14. Open element 'BAD GIRL_DBJ-ELEM (25)' copy and paste as new layer. Arrange it to the bottom right. Duplicate. Mirror/Flip.

15. Add new layer. Select all, fill with black, contract 2, fill with white, add noise 50 monochrome checked, contract 2, fill with black, contract 2, hit delete on your keyboard. Select none.

16. Add shadow as you prefer.

17. Add copyright. Add name. Save as PNG.

Thrones ~ by Joanne Salgado


Tutorial written by Joanne Salgado on January 26th, 2016
for those who have a working knowledge of PSP.
Any resemblance to any other tutorial is coincidental.
Do not copy and paste this tutorial anywhere on the net.
If you want to translate please ask first. 

Tube: Queen Thrones by SoulDesigner - you can purchase here
Kit Thrones by Bibi's Collection - you can purchase here
Font: Tenebrae

Don't forget to save often.
At any point if you have doubts check my tag.

1. Open a new image 650x550

2. Open element 'BIBI-THRONES ELEMS (97)' copy and paste as new layer.

3. Open element 'BIBI-THRONES ELEMS (94)' copy and paste as new layer. Resize 55%. Arrange it to the left.

4. Open element 'BIBI-THRONES ELEMS (91)' copy and paste as new layer. Rotate right 25. Move this layer below the frame layer. Arrange it to the bottom right of the frame.

5. Open element 'BIBI-THRONES ELEMS (89)' copy and paste as new layer. Resize 40%. Move this layer below the white flower layer. Rotate right 90. Arrange it to the bottom right of the flower (we only need the leaves).

6. Open paper 'BIBI-THRONES PAPERS (4)' copy and paste as new layer. Resize 30%. Arrange it behind the frame and clean the parts that appears outside it.

7. Open your tube. Copy and paste as new layer. Arrange it inside the frame as you like, clean the parts that appears outside the frame. Change opacity to 66 and blend mode to Luminance (L).

8. Open element 'BIBI-THRONES ELEMS (87)' copy and paste as new layer. Resize 50%. Rotate left 15. Arrange it to the middle right.

9. Open element 'BIBI-THRONES ELEMS (104)' copy and paste as new layer. Resize 90%. Move this layer above the frame layer. clean the parts above the inside of the frame.

10. Add shadow as you like.

11. Add copyright. Add name. Save as PNG.

January 25, 2016

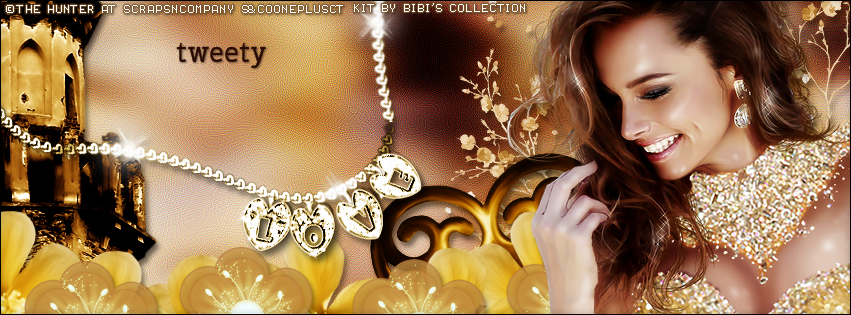
Golden Babe with Golden Dreams

GLITTERING TUTORIAL

**Click to see original size**

Tutorial written by Marcia Salgado on January 26th, 2016
for those who have a working knowledge of PSP.
I'm using PSP9 to create my tuts.
Any resemblance to any other tutorial is coincidental.
Do not copy and paste this tutorial anywhere on the net.
If you want to translate please ask first. 

****************************************
Material:

Tube: "Golden Babe" by The Hunter, you can purchase it here
do not use without the proper #license.
PTU Kit "Golden Dreams" by Bibi's Collection, you can purchase it here
Plugin: MuRa's Meister
Font: Cherry Swash

****************************************

--> Remember to save often and use my tag as reference if necessary. Use a Drop Shadow of your preference on layers. 

1. Create a new image 851x315.

2. Open your tube closeup. Copy and paste as new layer. Apply MuRa's Meister > Copies > Wall Paper (rotate) > Default. Gaussian Blur > 10. Select all. Clip to Canvas. Crop to selection. Motion Blur: Angle-90 Strength-100. Repeat. Diuplicate. Mirror. Blend Mode: Soft Light. Merge down. Enhance More and then Enhance. Duplicate. Blend Mode: Soft Light.

3. Open BIBI-GOLDEN DREAMS ELEM (49). Resize 65%. Mirror. Copy and paste as new layer. Move it way right.

4. Open BIBI-GOLDEN DREAMS ELEM (107). Resize 75%. Copy and paste as new layer. Move it down and way to left, show only half of the element.

5. Open BIBI-GOLDEN DREAMS ELEM (118). Resize 55%. Copy and paste as a new layer. Move it down and a little to left.

6. Open BIBI-GOLDEN DREAMS ELEM (98). Copy and paste as new layer. Move it way back and to left. Duplicate it and create a line of flowers at the bottom, some a little up others a little down. Use mirror too if you want. After finished merge these flowers in a single layer.

7. Open BIBI-GOLDEN DREAMS ELEM (101). Copy and paste as new layer. Move it down and to left. Do the same as before, this time keep the flowers a little away from each other.
 Merge them in a sinle layer too.


8. Open BIBI-GOLDEN DREAMS ELEM (105). Copy and paste as new layer. Move it up and to left.

9. open your tube closeup. Resize if needed. Copy and paste as new layer. Move itway to right.

10. Add a new layer, Select all. Fill it with black. Contract > 1. Delete.


--> Add your copyright info (no URL by Facebook TOU) and license#. Add your name. Save as PNG.

--> Sometimes I had to change my Timeline size to 846x313 because when I add it to Facebook the image has extra pixels and do not fit perfectly. So try this size if the same is happening to you.


Sweet Girl ~ by Joanne Salgado


Tutorial written by Joanne Salgado on January 25th, 2016
for those who have a working knowledge of PSP.
Any resemblance to any other tutorial is coincidental.
Do not copy and paste this tutorial anywhere on the net.
If you want to translate please ask first. 

Tube: Sweet Girl by The Hunter - you can purchase here
Kit Monroe Pink by Design by Joan - you can purchase here
Font: Courier New

Don't forget to save often.
At any point if you have doubts check my tag.

1. Open new image 650x550

2. Open element 'MONROE PINK_DBJ-ELEM (17)' copy and paste as new layer. Resize 60%.

3. Open element 'MONROE PINK_DBJ-ELEM (10)' copy and paste as new layer. Resize 70%. Move this layer below the frame layer. Arrange it to the left. Duplicate. Mirror.

4. Open element 'MONROE PINK_DBJ-ELEM (12)' copy and paste as new layer. Resize 70%. Arrange it to the bottom.

5. Open paper 'MONROE PINK_DBJ-PP (8)' copy and paste as new layer. Resize 40%.

6. Open element 'MONROE PINK_DBJ-ELEM (67)' copy and paste as new layer. Resize 65%. Move this layer above the frame layer. Arrange it to the top left.

7. Open your tube. Copy and paste as new layer. Resize as you prefer. Arrange it above the frame.

8. Open element 'MONROE PINK_DBJ-ELEM (30)' copy and paste as new layer. Resize 65%. Arrange it to the right.

9. Open element 'MONROE PINK_DBJ-ELEM (22)' copy and paste as new layer. Resize 50%. Arrange it to the right. Duplicate. Change blend mode to screen. Select the original butterfly layer and change opacity to 54%.

10. Open element 'MONROE PINK_DBJ-ELEM (78)' copy and paste as new layer. Resize 30%. Arrange it to the bottom right.

11. Add shadow as you prefer.

12. Add copyright. Add name. Save as PNG.


Cindy ~ by Joanne Salgado


Tutorial written by Joanne Salgado on January 25th, 2016
for those who have a working knowledge of PSP.
Any resemblance to any other tutorial is coincidental.
Do not copy and paste this tutorial anywhere on the net.
If you want to translate please ask first. 

Tube: Cindy by Carpe Diem - you can purchase here
Kit Cindy by Blissful Designs - you can purchase here
Font: Alex Brush

Don't forget to save often.
At any point if you have doubts check my tag.

1. Open a new image 650x550

2. Open element 'BD-E-26' copy and paste as new layer. Arrange it to the bottom left. Duplicate. Mirror.

3. Open element 'BD-E-6' copy and paste as new layer. Arrange it to the bottom right. Duplicate. Mirror/Flip.

4. Open element 'BD-F-1' copy and paste as new layer. Resize 45%.

5. Open paper 'BD-P-2' copy and paste as new layer. Resize 45%. Move this below the frame layer. Clean the outside parts.

6. Open paper 'BD-P-6' copy and paste as new layer. Resize 45%. Change blend mode to soft light. Clean the outside parts.

7. Open your tube. Copy and paste as new layer. Resize as you prefer. Move this layer above the frame layer. Arrange it inside the frame and clean the parts needed to look as its coming from inside the frame.

8. Open element 'BD-E-22' copy and paste as new layer. Arrange it to the top left.

9. Open element 'BD-E-23' copy and paste as new layer. Resize 95%. Arrange it to the top right.

10. Open element 'BD-E-46' copy and paste as new layer. Arrange it to the bottom right. Duplicate. Mirror.

11. Add shadow as you prefer.

12. Add copyright. Add name. Save as PNG.
Mask 1


MASK 1 - MARMADE


** Click to see original size **

My first mask, created by me using presets and brushes.
Made to use on tag below:

To save just click to enlarge and save.

Thanks

.